Thursday, July 31, 2008

CPS #75 and more cards!

This is the first time i'm doing the sketch at Card Positioning Systems. It's a great card site, I am a regular stalker of the blog but never taken the plunge until now. It was a fun sketch to play with. And I got to use my Pink Paislee heart stamp I received from Michelle at Color Me Daisy (thanks, Michelle!!)

And here a few other cards I made with Color Me Daisy's debut kit, Splish Splash. LOVE the greens and blues in the kit!


Hope you're having a great week! Friday is tomorrow, yeah!!

Wednesday, July 30, 2008

Color Me Daisy is LIVE!!

Come on over and join the fun at Color Me Daisy!!! The message board is live, there are new members joining every day, the DT has some great projects in the gallery, there are going to be challenges and contests...just all sorts of good stuff!! The debut kit, Splish Splash, is loaded with good stuff from American Crafts, Tinkering Ink, Heidi Swapp and more!!


Come on over and check out this new kit club and message board. I've got more fun kit creations to share and the place is just warming up. It's going to be fun!!

Tuesday, July 29, 2008

Creatively Yours

There's a new sketch blog in town! Okay, it's not brand spanking new, but it's fairly new to me. It's called Creatively Yours, by Noella. I've worked with Noella over at Scrapbooker's Club House, where she is the DT coordinator. She makes fantastic sketches, all different sizes, card sketches...you name it! She threw out some sketches this week and I decided to play with the card sketch.

Here is the sketch:


And here's my card. Again with the Euphoria. The lighting is a bit nasty because I had to take the photo inside, but you get the point!


Go check out her blog and play along!!

Monday, July 28, 2008

Basic Grey Euphoria!!

I am loving this newer line from Basic Grey. At first I thought it was going to be way to purple for me...but I love purple! And I am really enjoying playing with this paper. Yummmy!

For this card, I used my new Fiskars rubbing plates to add the texture on the white cardstock.


This was for a challenge to use a monogram on a project.


Our last challenge over at Scrapdango was to scrap a photo of yourself scrapping...with the theme for the page Why I Scrap. Appropriate, huh? Here's what I came up with. Very strict requirements for this one...5 different patterned papers, 4 different pieces of chipboard, 3 buttons, 2 kinds of cardstock and 1 photo of myself. Here's what I came up with!


I hand cut all the petals for the flower and curled the edges a bit for a little texture.


Like I said, that Euphoria paper is good stuff!!

Tuesday, July 22, 2008

Got Cake???

I'm taking a cake decorating class at my local Michael's and i'm having a ball. Last week we needed to bring a 2-layer cake and buttercream frosting in 3 different consistencies. We leveled, filled and frosted the cake. Then we learned all sorts of borders and zigzags and writing and the rose. The rose was definitely the hardest, some of mine looked more like cabbages. My daughter asked me if this was my wedding cake. I didn't bring any colors with me, so the whole thing is white! Here's my first attempt.


This week I am bringing cupcakes and we are learning more decorations. I can't wait!

Monday, July 21, 2008

Reveal Day-Garden Party!

It's reveal time for Scrapbooker's Club House. This kit featured the entire line of new My Mind's Eye Garden Party paper. And let me tell you, it is gorgeous!!! The kit also included some Heidi Swapp goodies, ric rac, Maya Road journaling sheers, Making Memories letters and more! It was fantastic to work with, I completed many layouts, tons of cards and a cute little gift bag!


I made this gift bag by following this tutorial. The perfect fit for a handful of candy goodies or even a gift card.


I made quite a few more cards and even have more scraps for...more cards! What a fun kit!! Thanks for taking a peek!

Friday, July 18, 2008

Growing Up Acrylic Album

I've wanted to do this album for a while, even had the photos printed out and everything. I got this Rusty Pickle acrylic album at a scrap expo I attended back in February. And...I finally got around to doing it! This was so much fun, these pictures range from the very first good shot I got of my kids together to present time (well, last Christmas). My kids had a blast seeing old photos of themselves. I basically put them in chronological order according to my daughter's hair. We've never cut it and it just keeps getting longer and longer!

The paper and diecuts are from Fancy Pants (Daydreamer collection) and a mish mash of a bunch of other stuff! I used alot of paint and stickles around the edges.


I have another acrylic album I bought and have just the idea for it! I can't wait to play with that on!

Monday, July 14, 2008

Some new layouts

So...I'm participating in 4 week challenge over at Scrapdango. Each week we get 1 challenge and 1 bonus challenge. The first week was a tough challenge, use orange, green, and purple on a layout. Also use 7 flowers and 5 different papers. That was a tough color combination for me, but this is what I came up with.

We also had to create our own sketch. This was fun, i've done sketches a few times and i'm getting better at it. I made this one in power point.

For this week's challenge, we were assigned somebody else's sketch to create a layout from. How fun is that????? Here is my layout based on Regina's sketch.

I used my new Pink Paislee stamps for the skulls and made my own skull from felt. Stitched on the eyes and mouth. I also used my nail file to grunge up the outside border of the layout and the PP. I stamped with corrugated cardboard on white cardstock to get the other patterned paper. This one was fun!! And I love these photos of my kids, they just LOVE music!!

The bonus challenge was to create a layout based on your own sketch. This came together quickly, i've been wanting to scrap this photo for a while. Love those felt flowers!!! I wish I had every color under the sun of the flowers!

I'm having fun with all the challenges!!! And the message board is so friendly, stop by when you have a chance!

Sunday, July 13, 2008

Weight Loss Special

Okay...just kidding! If you thought this post was about weight loss...you are sadly mistaken. It's all about this beautiful wonderful Peanut Butter Cup Cake I made this weekend. We were going to dinner and a playdate with some friends and my friend just had her birthday and because of the holiday I missed it. So...thought i'd bring dessert. And she likes peanut butter cups and I like peanut butter cups and I recently saw this post on Bakerella's blog. Have you seen this blog? One of the coolest foodies blogs out here! So many amazing foods and the photos she takes are amazing, too! Anyway, had to try out this cake.

Here's the recipe:
Ingredients
1 box (18.25 ounces) devil's food
cake mix
3 eggs
1 cup buttermilk
1/2 cup vegetable oil
2 cups chopped chocolate-covered peanut butter cups (about 8 ounces), plus more to garnish
8 ounces dark chocolate, chopped
1 cup heavy cream
1/2 cup creamy peanut butter

Directions
1. Heat oven to 350 degrees F. Coat two 9-inch round cake pans with nonstick cooking spray. Line with waxed paper; coat paper.

2. In a large bowl, beat cake mix, eggs, buttermilk and vegetable oil on low for 30 seconds. Increase speed to medium-high; beat for 2 minutes, scraping down side of the bowl after 1 minute. Fold in 2 cups of the chopped peanut butter cups.

3. Divide batter between prepared pans. Bake at 350 degrees F for about 34 minutes, or until a toothpick inserted in the center comes out clean. Let layers cool on a wire rack for 15 minutes. Turn out cakes onto wire racks and cool completely.

4. Place chopped dark chocolate in a medium-size bowl. Bring cream just to a boil and pour over chocolate. Whisk until chocolate melts. Add peanut butter and whisk until smooth.

5. Trim top of cake layers flat with a serrated knife. Put 1 cake layer on cooling rack and place on a baking sheet. Pour 1 cup frosting on top; spread evenly with a spatula. Top with remaining cake layer. Pour remaining frosting over the top, allowing it to spill over the sides. Smooth top and sides with spatula. Refrigerate 1 hour to set. Transfer cake to serving plate and garnish with chopped candy, if desired.

I made the 9 inch cake rounds on Thursday night. Frosted it on Friday night and put it in the fridge. I used more than a sprinkling of peanut butter cups on top, I went a bit overboard. Actually, I don't think it's possible to go overboard with peanut butter cups. You can see the frosting slid a bit and isn't perfect on the sides, but I did my best trying to smooth things out.
I was a bit freaked out about it melting all over the back of my car Saturday, as I had an hour drive to our dinner/playdate. But it survived in tact!


It was delicious! It was almost too rich and chocolately to finish, but by golly I finished my piece. Didn't want to be struck down by the rich and sinfully chocolately gods for not finishing my cake. Thankfully, I left the remainder of the cake with my girlfriend or else I might have eaten it for breakfast. She probably did!

Thursday, July 10, 2008

Acrylic Wall Hanging

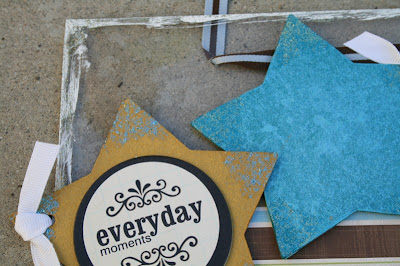
I always love the acrylic projects I see everywhere, so I decided to dabble a bit with the stuff. I had a fairly thick sheet of it that I bought at Home Depot last year. Took me this long to dabble in it!! My sweet hubbie cut me a piece that is roughly 8x8 and drilled two holes in the top for threading of ribbon. First off, I painted the outside edge with acrylic paint and then Stickles. I also dotted some Stickles in the corner in both blue and gold.

I used a glue stamp pad to stamp the flourishes, then dusted them with blue glitter.


Had two large chipboard stars, which I sanded and added quite a few layers of gold and blue Glimmer Mist. I just kept misting until I liked the color I had. I also added a chipboard saying to the middle of one of the stars. Added some ribbon as well as some more Stickles around the points of the stars. I went a wee bit Stickle-crazy. It's easy to do.

Matted my photo with a bit of patterned paper and there you have it!!

This hangs right by my scrap hutch and I love it!!

Tuesday, July 8, 2008

I'm a Daisy Girl!!!!!

I am so excited to announce i've been chosen to be on the Daisy Girl Design Team for a brand new site, Color Me Daisy!! The message board and site are going live August 1st and it's all very exciting!! I am looking forward to meeting all the Daisy Girls and launching this great new kit club. Check out the blog and i'll keep you posted when it all goes live! It's going to be FUN!!!!

Saturday, July 5, 2008

Sequoia Photos!!!

We had a fabulous time camping in the Sequoias. It's just beautiful there and the weather was perfect! We camped at Dorst Campground, roughly in the middle of the park. Got a great spot that backed up to a gorgeous meadow, so nobody was camping behind us. The kids are also so excited to set up their sleeping bags in the tent! We stopped at Lost Grove and did a bit of hiking and checking out the Sequoia Trees before we set up camp. We spotted a black bear in the camp the first night. The kids were excited!!


Our first day was spent hiking through the forest, seeing all the touristy sites and looking at lots and lots of huge trees! A trip wouldn't be complete without a drive through tunnel log!

We stopped at Lodgepole to check out the Kaweah River. So beautiful. Can you just see Craig scoping out the best fishing spots?

On the way back from Lodgepole, I...with my eagle eye...spotted this cutie black bear rooting around for grubs. I made Craig stop the car in mid-drive and back up and pull off so I could get some pics!!


Our campground was under mountain lion watch the whole time we were there. The night before we arrived, a mountain lion killed a deer in the campground loop right across from us. Killed it right in the middle of a campsite. Our first night after we went to bed, we heard the dogs from 4 campsites down start barked. And then we heard a very loud snarl. Okay, so the mountain lion was real! The rangers were very very serious when they showed us how to protect our necks and throats if attacked. It made a big impression on my 6 year old!!!

Hume Lake was next for fishing and swimming. We fished over by the dam...and caught jack squat!! A good lesson in patience for the kids. Ha!!

We had lunch and played by the river. Despite the 500 warnings that the rocks were slippery...sure enough Kevin slipped and slid down a bunch of rocks and ended up in a little pool of water. Kinda funny to watch..we tried to play it off like he made his own water slide. He wasn't buying it!

After swimming in the lake, we stopped at a little turn off by the edge of the lake. Craig wanted to try fishing again while the sun was getting low in the sky. And sure enough, we caught some whoppers!! Here is Kevin's first fish!

The next day was a free day. Whatever the kids wanted to do...after taking a shower! We went back to Lodgepole and hiked around the Kaweah River. Craig wanted to try fishing again. We found a nice spot by the river and Craig found a big log that he was sure the fish were hiding under. And we caught a few rainbow trout...not huge but we were excited!


We were also treated to these visitors everynight at the campsite. Some even showed up in the morning. The last night we were there, 5 deer were in the meadow behind us, just snacking away.

We did lots of walking and hiking and the kids did great! We had smores and campfires and stories and loads of fun. We did not want to come home, but such is life. We will definitely be going back!