Pages

Sunday, October 31, 2010

Happy Halloween!!!

Yeah! I love Halloween!!! We've been partying all weekend starting on Friday afternoon with a kids party with some good friends. It was so fun, we even did a scavenger hunt with the kids. The kind where you go door to door and ask for stuff. My kids thought it was the greatest game ever and are still talking about it. Saturday night my husband and I went to a costume party without the kids and they stayed with their Aunt and Uncle and had a ball. Today is carving pumpkins and trick or treating tonight. Fun fun!!

I am going to share a little Halloween goodie I made this year. I know it's too late to make this for Halloween now, but it could easy be tweaked to go with any holiday!


I made the card a few weeks ago for a challenge at Citrus Tree Studios. I made the Monster Munch this weekend and here is the recipe:

12 cups popped popcorn (I used microwave stuff, just made sure it was natural, no butter added)
1 cup candy corn
1 cup roasted peanuts
1 cup Reese's pieces
1 bag of white chocolate chips
1/2 bag chocolate chips

Combine all the dry ingredients in a big big bowl. Melt the white chocolate and pour over the dry ingredients. Mix, mix, and mix until everything is coated. Spread out over waxed paper to let cool. While it's cooling, melt the chocolate chips and drizzle on top. Let everything set up, then break into chunks. It's soooo good!!


I've seen many variations of this out there and I just kinda tweaked it to use what I already had in the pantry. The only thing I had to get was Reese's pieces. I'm sure it would work just as well with M&M's or peanut M&M's.


With all the fun christmas and holiday goodies that come out (they even have red and green candy corn!!), you could definitely make this a holiday treat. I love those kraft bags with the window. The inside is lined with waxed paper so you don't have to worry about your treat leaking through the bag. I got them at Papertrey Ink.

I hope you all have a very spooky and happy Halloween!! Thanks for stopping by today!

Friday, October 29, 2010

Snickers Cupcakes

Every year, after Halloween trick or treating my mom would inspect our candy. Take out all the apples and handmade stuff that could contain deadly poison or razor blades. Did that really even happen? Regardless, my mom made sure we were safe. Apparently, she was also making sure we were safe from Snickers bars. Because they always seemed to disappear from our treat bags. I think I was about 10 before I actually got to eat one (ha ha, just kidding mom!!!). And the best way to eat Snickers, or pretty much any candy bar, is straight from the freezer. So when I ran across this Snickers cupcake recipe at My Baking Addiction, it went on my to-bake list. And bake it I did!!

The really awesome thing about this recipe is you start with a box cake mix. Yes, that's right. A box cake mix!! It gets doctored up with instant pudding mix, sour cream and lots of eggs. Did I mention they are super healthy?? Ha!


More awesomeness...there is a mini snickers inside each cupcake. You put the mini snickers in the freezer before popping them into the batter. I overfilled my cupcake pan a bit, not realizing that when I put the snickers in the batter was going to be displaced and push up. Lesson learned on that one. The frosting is a caramel vanilla buttercream and the tops are drizzled the caramel sauce and more chopped snickers.


There are no words for these cupcakes. They were amazing. The cake was moist and light and fluffy and the buttercream was to die for. I know I am always saying things are delicious on this blog, but I think this might be my favorite chocolate cake. It was easy (from a box!!) and cooked up just the way I liked it. And with a hidden snickers inside! I would highly recommend these!! They might be a good way to win over some friends and influence others.

I hope you are having a fantastic Friday!! We are off to a Halloween party in a little bit and that's just the beginning of a fun Halloween weekend!! I hope you have a great weekend, too. Thanks for stopping by!

Tuesday, October 26, 2010

Mini Pizza Box

I love making little boxes. They are always so fun to embellish and decorate and put cute stuff in. I have quite a few just sitting around, already embellished...just waiting for the perfect gift to put inside! Over at Croppin' Paradise this week, I have a tutorial up on how to make a mini pizza box. I got the template and instructions from the ScorPal projects website. They have so many fun templates and things you can make over at the ScorPal website. I don't work for Scorpal, but I do have one and looove it!!

Here's a brief run-down. You will need:
paper cut 6x11 inches
something to score with
strong adhesive

Take your piece of 6x11 paper. With the short (6 inch) end of your paper up, score at 1 inch from each side. Then with the long (11 inch) end of your paper up, score at 1", 5", 6", and 10". Here is a visual to help...


You will want to cut to the fold along the 11 inch side at the places where you have scored. I hope that makes sense! With your strong adhesive (I used my new glue gun which I am a bit obsessed with, it's amazing), glue all the tabs to the inside of the box. You don't want them showing when the box is complete.


Can you see my new little beauty peeking in the background??? Hi glue gun!!! Now you just have to embellish!! I used the Hello Beautiful line from Bella Blvd. Some seriously bright and fun colors with these papers.


And don't let the word mini fool you, they can hold alot! Just keep your eyes off that peanut butter cup...after the photo shoot, it was MINE! LOL!!


And no post about embellished boxes would be complete without a shout out to my friend Beth. She makes BEAUTIFUL boxes and I get inspired everytime I see some she has completed. Go check out her blog and find some pretty boxes to inspire you!!

Here is one more that I made last year for a gift. I added some small thank you cards inside for the recipient to use.


And the cards inside!


That's all I got today, friends!! Are you ready for Halloween this weekend?? I think we are ready, we just need to carve pumpkins but we have costumes ready and candy bought! Thanks for stopping by!!

Sunday, October 24, 2010

Sunday is RUN day!!!

Happy Sunday everyone! I was up at 4am this morning, getting ready to pick up my girlfriends and driving to the start line of the Los Angeles Rock and Roll Half Marathon! I have been training for this race for 10 weeks and the day was finally here. While I brought my camera (just my little point and shoot), I don't have any photos except one from the finish. But I am happy to say that I beat my previous best time in the half marathon by 16 minutes. I wanted to run under 2 hours and ran a 1:54 today. Yeah! The weather was perfect, the race was very organized and it seemed like everything just came together today. Here I am with my girlfriends (I am the one who didn't get the memo about wearing a pink shirt!) who also ran, having a free beer at the end of the race. Miller Genuine Draft 64...super light beer...not the best beer but the best today!


I am sore now and super tired and can't stop drinking water. But it was a good race and I am already looking forward to the next one!

I will leave you today with a few projects I did recently for Croppin' Paradise using the Reminisce line called Autumn Forest. The colors are perfect for fall!! I was a bit hesitant about the cutesy animals in this line, but they are actually my favorite part of my layout.


The leaves and cute animals are on the big sticker sheet that coordinates with this line, I love them! My daughter loves this layout too...because of that cutie squirrel!


And one more...a card using the scraps! Wouldn't this make a cute thank you for a teacher?


Okay, I am getting ready to crawl into bed and veg out for a bit. Hope you all had a great weekend! Thanks for stopping by!!

Thursday, October 21, 2010

Bo Bunny Cards

Happy Thursday everyone! I can't believe it's still raining today...but it is. It's been raining all week, pretty unusual for this time of year. I hope it clears up just a little bit, I am running the Los Angeles Rock and Roll half marathon on Sunday! If the rain would go away but keep the temperature on the cool side, that would be perfect for race day! Wish me luck...i'll be at the start line Sunday morning...my ipod charged, butterflies in my stomach, and ready to rock the half marathon!

But for today...some cards. Specifically, some cards using the Olivia papers by Bo Bunny. I loved the colors!


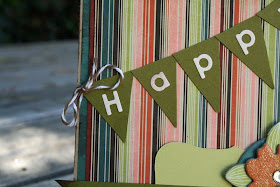
Yeah! Banners are back! LOL!!! I added some baker's twine for a little twist on the banner.


And one more card because I could not let any scraps go to waste and I just LOVE the embellished chipboard Bo Bunny includes with all their lines!


I have been having fun adding some baker's twine to my projects.


That's all I got today, friends! I am looking forward to watching Giants lose tonight (I hope!), reading Harry Potter with my kids, and doing one more training run tomorrow before my race on Sunday. Thanks for stopping by!

Wednesday, October 20, 2010

Pumpkin Chocolate Chip Muffins

Seems like this time of year, everybody is looking for a good pumpkin bread recipe. Me included! I know I have made it in the past, but don't have any recipes saved or printed out. So I went in search of a great recipe. I spent more time than should be allowed on the internet checking out all sorts of fun pumpkin recipes! But I kept coming back to this one...Pumpkin Chocolate Chip Muffins from the Joy of Baking website.

Do you know why I liked it? Because it called for butter instead of oil. I have nothing against oil, but some recipes called for 1 cup of oil and that freaked me out. I'm sure if butter and oil went head-to-head, neither would be called healthy. But I just couldn't pour out 1 cup of oil and use it. Call me strange.


This recipe also had a good amount of pumpkin (which I actually increased from 3/4 cup to 1 cup) and I think that really let the pumpkin flavor shine. Some pumpkin breads are so sweet, you forget there is pumpkin in it. Not like i'm an expert or anything, but I love pumpkin so I want to taste it. Oh yeah...and then there are the chocolate chips...


I used mini chips and there was chocolate in every bite. I would highly recommend this recipe. Even if you already have a favorite, try this one. Because you can't go wrong with a freshly baked batch of muffins in the house.

Pumpkin Chocolate Chip Muffins
from Joy of Baking

1 1/2 cups (195 grams) all purpose flour

1 teaspoon baking soda

1 teaspoon ground cinnamon

1/4 teaspoon ground ginger

1/4 teaspoon ground cloves

1/4 teaspoon freshly ground nutmeg

1/2 teaspoon salt

1/2 cup (113 grams) unsalted butter, room temperature

1 cup (200 grams) granulated white sugar

2 large eggs

1 teaspoon pure vanilla extract

1 cup solid packed, canned pumpkin puree

1 cup (175 grams) semisweet chocolate chips

Preheat oven to 350 degrees F (177 degrees C). Place rack in the middle of the oven. Line 12 muffin cups with paper liners or spray each cup with a non stick vegetable spray.

In a large bowl, sift together the flour, ground spices, baking soda, and salt.

In the bowl of your electric mixer, or with a hand mixer, beat the butter and sugar until light and fluffy. Add the eggs, one at a time, beating well after each addition. Beat in the vanilla extract. Scrape down the sides of the bowl. With the mixer on low speed, alternately add the flour mixture and pumpkin puree, in three additions, beginning and ending with the flour mixture. Fold in the chocolate chips.

Fill the muffin cups evenly with the batter using two spoons or an ice cream scoop. Place in the oven, bake for about 18 - 20 minutes, or until firm to the touch and a toothpick inserted in the center of one of the muffins comes out clean. Place on a wire rack to cool.

Makes 12 regular-sized muffins.

Thanks for stopping by today!!

Monday, October 18, 2010

Just Wander

This month at 3 Scrappy Boys, the Add-on kit featured the Wander line by Basic Grey and I fell in love! I was just thinking about how I was scrapping more layouts of my daughter compared to my son...and then I received this wonderful kit. What beautiful colors in the papers, blues, reds, greens...it screamed boy to me!!


The kit has these fun acrylic letters that I painted with acrylic paint for the title. Yes, sticks will become guns and boys will be boys! Ha ha!!


Some fun acrylic arrow stickers in the kit, too!! And so then what did I scrap? A photo of my daughter....whooops!!!


I don't know what it is about photos of backs to the camera. I just love them. Maybe because these 2 girls were oblivious to me taking photos and were just having fun exploring the tidepools, that's what I love about the photo.


This will be my last kit for 3 Scrappy Boys. I had a ball designing with their kits, thanks Heather and all the other team members for a great time!!! There are some talented new designers and some oldie-but-goodies over at 3SB, go check out their kits if you are in the market. They are awesome!!

Thanks for stopping by today!!

Sunday, October 17, 2010

Little Pink and Black treat bags

Hi Everyone! Today i'm going to share one of my submissions to PSA Essentials. When Libby contacted me to see if I wanted to design some projects with her stamps, I was thrilled when she sent me a stamp set called Dare to Dream. I was getting ready for my Avon 2-day Breast Cancer walk and these stamp sentiments were perfect for some goodie bags that I wanted to make for my teammates. I used a treat bag templated called the 2-4-6-8 favor box I found on the Scor-Pal website. I started with black cardstock, stamped some polka dots, then created the tags on the front with the PSA stamps. Super easy and quick!


There were 17 women on my team so I made alot of these boxes!


All of these sentiments were perfect for a group of women who had just spent 6 months fundraising money for breast cancer treatment and awareness. We definitely Made It Happen the weekend of our walk! I just love using Baker's Twine right now, such a fun detail to add to any project.

That's all I have today! I hope you had a great weekend. Ours was wet and rainy, and it's supposed to rain through Wednesday. Stay dry and thanks for stopping by!

Thursday, October 14, 2010

Cookies & Scream Cupcakes

With Halloween coming, I feel like it gives me license to play around in the kitchen more. I don't know why...maybe it's just a great excuse to play around in the kitchen more! Maybe it's because I have a half marathon coming up and i'm tapering (cutting back on mileage) for the next week and I have a whole lotta extra energy to burn up. Maybe it's because I love to eat sweets and treats. Whatever the reason...it's the reason I made these. Cookies and Scream Cupcakes:


What makes these so Halloweeny is using the Oreos with orange filling! I have had this recipe on my to-bake list for a while and when I saw the orange Oreos at Target...I had to buy some. The recipe comes from Annie's Eats, a great food blog. And the fun part? There is a surprise Oreo at the bottom!


Did you see it? The orange Oreo at the bottom? Awesome!!


My kids were excited to see it there. I will be honest with you, I felt like the cake part was very dense. Almost too dense. I don't know if my baking powder wasn't acting right or the Oreos made the batter dense or what happened. They were not light and fluffy. But they tasted pretty good!


What goodies are you baking up this fall? Do you make any fun treats for Halloween? I'd love to hear about it!! Thanks for stopping by today, friends...

Wednesday, October 13, 2010

Creative Scrappers Sketch #125

Hi Everyone!! I decided to play along with Creative Scrappers this week. This is an awesome sketch blog, you should definitely check it out!! Here is the sketch...


And here is my layout. I used the Add-On kit from 3 Scrappy Boys this month, which features the Wander line from Basic Grey!


You may be asking yourself...blues and greens with a sunset photo? Yeah, I wasn't sure it was going to work either. But I played with the photo a bit in photoshop and made it a bit dark and mysterious with just a pop of sun peeking over the horizon. And I think it works! And you really can't go wrong with circles, lots and lots of circles!


A little bit of paint, some flowers, and some letters from Cosmo Cricket finished it off!


I went to Hawaii last year at Thanksgiving and this is the first photo i've scrapped from that trip! I have sooooo many photos, it's completely overwhelming. So I chose to ignore them for now. Has that ever happened to you??

Happy Wednesday everyone, thanks for stopping by!

Monday, October 11, 2010

Bo Bunny Olivia

Monday...again??? I feel like this past weekend zipped by way too fast! Here we are at Monday again. I had the chance to get my hands on some new-ish Bo Bunny and it was perfect for this photo I took of my daughter this summer. The Olivia line is available at Croppin' Paradise...all the fun embellishments too!!


I fussy cut the flowers from patterned paper and then added some chipboard embellishments. I love their matching chipboard!


I sat down to scrap this weekend and realized I have been making a ton of pages of my daughter. Maybe it's because we just celebrated her birthday or because she still lets me take fun photos of her...I don't know. But I do promise some layouts of my son are coming real soon! He's in this weird doesn't-want-to-give-me-a-real-smile world and I am having a hard time getting good pics of him. Well, too bad for him. I'll scrap them anyway! Ha ha!!

Hope you all had a great weekend...Happy Monday!!

Saturday, October 9, 2010

Pumpkin Spice Granola

I love Oats. Oh, yes I do. Hot oatmeal, overnight oats, granola, oatmeal cookies, I love it all. I like to buy the 25 pound bag of oats at Costco! So when I saw THIS recipe for Pumpkin Granola, I knew it was going to be in my breakfast future very very soon.


About 20 minutes into baking this, the whole house started to smell delicious. Like fall, like a delicious, spicy, cinnamon fall!! I added chopped almonds instead of pepitas, and they added a great crunch. I also added dried cranberries, but since cranberries are like candy to my son...he picked most of them out of the bowl and hoarded them for himself! I have actually made this recipe twice, the second time I added almonds and sunflower seeds and 1/2 cup of ground flaxseed to the wet ingredients. So so so yummy!!

I loved eating this with vanilla greek yogurt for breakfast and I may or may not have added it to a bowl of ice cream for dessert after the kids went to bed. It was that good.

Pumpkin Spice Granola
adapted from Two Peas And Their Pod

5 cups rolled oats
1-2 teaspoons pumpkin pie spice
1-2 teaspoons cinnamon
1/4 teaspoon nutmeg
1/2 cup ground flaxseed
¾ cup brown sugar
3/4 cup pumpkin puree
1/2 cup applesauce
1 teaspoon vanilla extract
3/4 cup dried cranberries
3/4 cups chopped almonds

1. Preheat the oven to 325° F. Spray a cookie sheet with non-stick spray and set aside.

2. In a large bowl, combine oats, spices, chopped almonds, sunflower seeds. Mix well.

3. In a medium bowl, whisk together brown sugar, pumpkin puree, applesauce, and vanilla extract. Whisk until smooth. Pour wet ingredients into oat mixture and stir until the oats are evenly coated. They will be moist. Evenly spread the mixture onto the prepared baking sheet.

4. Bake for 20 minutes. Remove pan from the oven and stir. Bake for an additional 15-20 minutes or until the granola is golden and crisp. Remove from the oven and stir in dried cranberries. Let cool completely. Store in an airtight container.

I hope you are all having a great weekend...Thanks for stopping by!