Tuesday, August 31, 2010

NY Times Chocolate Chip Cookies

Everybody has their favorite chocolate chip cookie recipe. And everybody claims theirs is the best. I have tried many many CCC recipes in my day and while I've never turned any of them down...some aren't as good as others. So I was intrigued when I ran across this article from the NY Times. If you want to read it, check it out HERE. I have seen this recipe all over the blogosphere, so thought it was about time to try it out.

Do you want to know the trick to this recipe? Chilling the dough. For at least 36 hours. Yes, you read that right. Chill the dough for almost 2 days!!!! What is wrong with these people? Don't they know cookie dough is meant to be eaten raw by the spoonful?? Immediately after mixing? Well, i'm here to tell you...it's well worth the wait.


Don't get me wrong, the dough was fantastic. But the cookies? Amazing. I know I say that about alot of recipes I post on this blog, but these are hands down the best chocolate chip cookies I have ever eaten. And when I was younger, we stopped at Mrs. Fields Cookie shop in the mall ALOT and these are even better than those!


I used chocolate chips for this batch shown, but I made another batch using a big fat chocolate bar from Trader Joe's that I chopped up. I loved the big chunks of chocolate. If you're going to try this recipe, so with the big chopped up chocolate bar. Yum-O. The only thing I did not do is sprinkle the cookies with sea salt.


I made these for co-workers to thank them for donating to my Avon Walk (remember this post?) and received many compliments. If I can plan ahead, this is definitely my go-to CCC recipe from now on!!!

Chocolate Chip Cookies

Adapted from Jacques Torres, recipe from the NY Times
Time: 45 minutes (for 1 6-cookie batch), plus at least 24 hours’ chilling

2 cups minus 2 tablespoons (8 1/2 ounces) cake flour
1 2/3 cups (8 1/2 ounces) bread flour
1 1/4 teaspoons baking soda
1 1/2 teaspoons baking powder
1 1/2 teaspoons coarse salt
2 1/2 sticks (1 1/4 cups) unsalted butter
1 1/4 cups (10 ounces) light brown sugar
1 cup plus 2 tablespoons (8 ounces) granulated sugar
2 large eggs
2 teaspoons natural vanilla extract
1 1/4 pounds bittersweet chocolate disks, at least 60 percent cacao content
Sea salt

1. Sift flours, baking soda, baking powder and salt into a bowl. Set aside.

2. Using a mixer fitted with paddle attachment, cream butter and sugars together until very light, about 5 minutes. Add eggs, one at a time, mixing well after each addition. Stir in the vanilla. Reduce speed to low, add dry ingredients and mix until just combined, 5 to 10 seconds. Drop chocolate pieces in and incorporate them without breaking them. Press plastic wrap against dough and refrigerate for 24 to 36 hours. Dough may be used in batches, and can be refrigerated for up to 72 hours.

3. When ready to bake, preheat oven to 350 degrees. Line a baking sheet with parchment paper or a nonstick baking mat. Set aside.

4. Scoop 6 3 1/2-ounce mounds of dough (the size of generous golf balls) onto baking sheet, making sure to turn horizontally any chocolate pieces that are poking up; it will make for a more attractive cookie. Sprinkle lightly with sea salt and bake until golden brown but still soft, 18 to 20 minutes. Transfer sheet to a wire rack for 10 minutes, then slip cookies onto another rack to cool a bit more. Repeat with remaining dough, or reserve dough, refrigerated, for baking remaining batches the next day. Eat warm, with a big napkin.

Yield: 1 1/2 dozen 5-inch cookies.

I hope you try these cookies, they are amazing!!! Thanks for stopping by today!
Sunday, August 29, 2010

Mango Sorbet

My ice cream maker and I have a love/hate relationship. I love making ice cream, love eating it, love making ice cream sandwiches, and it just screams summer to me. I hate the fact that homeade ice cream is irresistible and it adds inches to my waist. So, I haven't made ice cream in a long time. But this summer was it. I had to break it out from the pantry, dust it off, and use it. And luckily for me, my hubbie bought more mangos than we could eat at Costco last week. They were all ripe at the same time and we didn't want any to go to waste. Because a ripe mango is a beautiful thing. So...I made this...


Mango Sorbet

4-5 ripe mangos, peeled and chopped
1 cup simple syrup (dissolve 1 cup sugar in 1 cup warm/hot water)
2-3 tbsps fresh lime juice

Yea, that's it. Puree all the ingredients together and let it cool down. Put the puree into your ice cream maker bowl and make according to your ice cream makers directions. Mine took about 30 minutes. I scrapped it all out of the bowl into a storage container, then froze overnight.

This was amazingly delicious. The mango flavor was intense, due to the very ripe fruit. I probably could have cut back on the simple sugar, but I decided to live on the edge and use it all. It was soooo good!!

Now i'm itching to make more flavors. We are at the end of strawberry season around here, maybe a strawberry sorbet? Or i'll just bite the bullet and make some real ice cream and add some miles to my running schedule. That should even things out.

Hope you are having a great weekend! Thanks for stopping by!!

Friday, August 27, 2010

Die Cuts & Border Punches

Our assignment over at 3 Scrappy Boys this month was to showcase our border punches and diecuts. I do love my border punches and enjoy using my Cricut, so this was fun!!

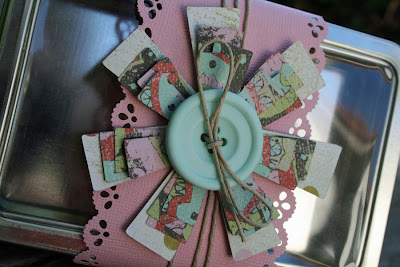
First up...using my border punch to make a layered, fancy border. Easy Peasy!


I punched a few layers with my apron lace punch, even the base of the card. I also just love those Jillibean Soup canvas flowers!


I used a Martha Stewart punch for this project (found it 60% off at Michaels!!) along with flowers that I cut with my Cricut. I do this alot, cut descending sized flowers, layer them and add them to a project!


Altered projects are a great way to use a big ol' button that you might be hesitant to use on a layout. I know I am, I like layers on my layouts but sometimes they just don't lie right in my albums.


Border punches and your diecutting machine are great ways to add a unique touch to your projects! And lookie what I got in the mail this week...Baker's Twine!!!!!!!!!


I got this sampler pack from The Twinery and I can't wait to play with it! I hope you all have a great Friday! Thanks for stopping by!!

Wednesday, August 25, 2010

First Day of School!

Hi everyone...it was the first day of school today! I am so happy that both my kids got placed with great teachers, that makes for very happy parents. So today was the big day...back to school.

Here is Kevin, 3rd grade. He is getting so tall, he is up to my shoulder now and his feet are almost as big as mine.


And Kayla, 2nd grade. She put that outfit together all by herself. I love the scarf. And that is EXACTLY how she wanted to wear her socks. Don't try to talk her out of it. She won't listen. At all.


My 2 babies together!


By the time we got to school, she had ditched the headband all together. Here she is patiently waiting for her classroom to open.


Kevin had already found his friends and run off to his classroom at this point. And i'm happy to report they both had great days. Thank goodness! So the school year begins, with homework and friend drama and all the good and bad inbetween. Happy School year everyone!

Tuesday, August 24, 2010

Cookies & Scraps

Happy last day of summer, everyone!! My kids are going back to school tomorrow and the weather has decided to get really really hot. It was close to 100 degrees today. What happened to it being hot when the kids are off school? Not this year, looks like we are in for a hot fall and soccer season!

I wanted to thank you all for such kind comments on my Avon Walk for Breast Cancer post (you can read it HERE). We have raised over $31,000 so far and we are all very excited for walk weekend! Only 3 more weeks to go. I was lucky enough to be supported by some very generous co-workers and decided that some thank-you baking was in order. I made an awesome new-to-me chocolate chip cookie recipe (blog post coming soon) and wanted to package them up all snazzy. But not too snazzy, because I didn't have alot of time this weekend.


I used some scraps from the Max and Whiskers and Green at Hearts paper by Basic Grey. I dug out my trusty scalloped and circle punches and punched lots of circles. The outer stamps are from Papertrey Ink, they are spring themed stamps but I love how I can use them for anything. The thank you sentiments are Hero Arts.


I ran the circles through my adhesive xyron and stuck them to the bags. Instant gift tags and cookie bags! I passed them out today at work to all my donors and got big smiles. Yeah!! It was hard giving away all those cookies...wish I had a bag for myself. The best chocolate chip cookie recipe is coming...stay tuned!!

First day of school tomorrow...hope it all goes well! Thanks for stopping by!!

Saturday, August 21, 2010

Chocolate Caramel Shortbread

Happy Saturday everyone! Is it really Saturday? I'm not complaining, but it was a busy week and I am glad it is over. My hubbie went back to work this week, my kids go back to school next week, soccer starts next weekend...the fun is just beginning! But i'm still finding time to sneak in some baking. Because a girl has to keep her sanity in check, right??


Today's recipe is Chocolate Caramel Shortbread. I found it on My Baking Addiction, another one of my bookmarked baking blogs. I made these for a friend of mine who just injured her ankle running. We were both training for a half marathon in October, but she got hurt. And was not happy about it. I was hoping these would bring a smile to her face!


The caramel in the middle is not your typical caramel. No candy thermometer required, just a microwave and some patience. It has a very light flavor that adds a bit of chewiness between buttery shortbread and yummy chocolate. My husband loved these!


I have a teeny confession to make...I save all those plastic clamshell containers from the store. And from work, when I get my lunch from the cafeteria to-go. My husband hates it because I have a whole closet full of plastic clamshell containers. But they are perfect for giving away treats and goodies. All they need is a little bit of dressing up!


I covered the top with some cardstock (because I could not get the sticker off) and added a homeade bow. Cute, huh??!!


And i'm happy to report, my friend loved them and so did her family. So I consider that a success!


Have a fabulous Saturday everyone!!! I am headed for the kitchen to bake cinnamon rolls with my daughter. She requested it, so we will bake it. Thanks for stopping by!

Tuesday, August 17, 2010

More 3 Scrappy Boys goodies

I have another layout today from the August 3 Scrappy Boys kit. I loved the Fancy Pants papers in this kit and I thought they went well with this black and white photo I have of Kayla. I used an action from Coffeeshop Photography for this picture, I think it's called newsprint? She has a ton of free actions for photoshop, you should definitely check it out!

Okay...on with the layout!


I am not the best with vintagey/shabby chic layouts but the papers and embellies in this kit made it easy! Beautiful wood frames and fabric flowers...


Hambly rubons and some pearl swirls from my stash...


Lots of distressing and a heart banner with pink pearls!! What do you think...has the banner craze gone too far or will banners continue to pop up everywhere???


This is my most favorite layout i've made in a while. I just love the pink and aqua together. Funny how trying something out of my comfort zone really inspired me!

3 Scrappy Boys is having a Back-to-School crop on September 11-13th. Now that the kids are going back to school, you might find yourself with MORE time to scrap! Come check out the message board!

Thanks for stopping by today, everyone!!!

Sunday, August 15, 2010

Kings Canyon National Park

A few weeks ago, we loaded up the trailer and hit the road. We were headed to Kings Canyon National Park. It's connected to Sequoia National Park and it's one of the most beautiful places on earth. The Kings River is amazing and it winds through some beautiful areas. Fishing, hiking, white water rafting, cave exploring...you can do it all here. My hubbie and I have been there, but it was the first time for my kids. Our campsite backed up to a small creek, and about 50 yards beyond that was the Kings River. It was stunning. Except for the mosquitos that ate me alive, but that's a different story.

Want to see???


I really struggled with my photos on this trip, it was very shady in some places, shadowy in others. Sometimes I was in complete shade, trying to take a photo of something in full sunlight. I did alot of messing around with settings on my camera. I need lots of practice with this!!


It took me a while to 'fix' some photos in photoshop. I am trying to take better photos so I don't have to do so much messing around with them later.


I think this last one is one of my favorites. We were inside a huge hollowed out sequoia tree and this was the view looking out a peep hole. Pretty cool!

So, have you ever taken a photography class? I have been looking at Jessica Sprague classes and also Big Picture Scrapbooking classes. I really need a class, I think, to just get a handle of all the photography stuff. If you have taken a class you liked, let me know! I'd love to check it out!!

Thanks for sitting through this epic photo post!!!

Friday, August 13, 2010

Crazy Daisy!!

Happy Happy Friday to you all!! At the moment, my sweet hubbie and I are taking a much needed vacation without the kiddies. One of our friends is turing 40 this weekend and 4 other couples and us are meeting in Palm Springs for a fun filled birthday weekend. No matter it's probably 115 degrees in Palm Springs...we'll be sitting by the pool, getting massages, and having a few frosty beverages. Ahhhh...life is good.

In the meantime, I want to share with you some layouts from the August Crazy Daisy kit. Lots of FUN papers in this one...DeLovely by Cosmo Cricket, HeatWave from American Crafts...and more!

Here is my first layout, using DeLovely...so lovely!


Lots of fun flowers and brads to layer in this kit. And I liked journaling around the edge of the layout, something different for me!


And one more, this time using American Crafts papers. And don't worry...I'm still obsessed with banners.


There were some fun rub-ons in the kit. I transferred them to cardstock, then cut them out before adding to the page. And the red letters??? Target dollar spot! Oh yeah, baby!


That's it from me! I hope you have a great weekend...I'll catch up with you all when I get back. Hopefully, not TOO sunburnt...Thanks for stopping by!


Tuesday, August 10, 2010

On a Serious Note...

I usually don't share too much personal stuff here on the blog, but this time I've decided to. It's a very important subject, not one that is easy or fun to talk about. But it affects so many people's lives, I wanted to let you all know about a walk I am doing to raise money for breast cancer. But first...let me introduce you to Beth.


Beth and I met in 6th grade. We had every single class together in 6th grade. She was my first real friend and we became close very fast. The funny thing is, we never had another class together again! All throughout junior high and high school, we stayed close. We both went off to college, got married, had kids...and remained friends throughout. I even still have the very first letter she sent me when we left for college. That was BEFORE email, people! Fast forward to now...her mom is a 10-year breast cancer survivor. And it hasn't been easy for her mom or their family. Beth did the Avon 2-day Walk for Breast Cancer last year and she said it was an experience that changed her life. So this year...I decided to join her. She has put together an amazing team of 17 incredible women who are doing the Santa Barbara Avon 2-Day Walk for Breast Cancer. Our team is called Walking For The Girls! We all have to raise a minimum to be able to walk and so far our team has raised almost $28,000!!!

Here is another reason i'm doing this walk:


This is my dad. He was a great dad. He worked so hard for his family during the week and on the weekend he would shuttle my siblings and I all over the place to different swim meets. Every weekend. Being a parent now, I know how much he did for us!! He was active, loved biking and swimming, hiked the Appalacian Trail, loved to travel, drink good wine and eat good food. He was diagnosed with multiple myeloma and we lost him almost 4 years ago to that cancer. My mom is a 2-time cancer survivor as well. I know that even though i'm raising money and walking for breast cancer, I am walking for my mom and dad and everyone else affected by cancer.

It will be an honor to walk with my team in September for the Avon Walk. We will walk 26.2 miles on Saturday, shower in a big rig at the end of the day, spend the night in tents, and then walk 13.1 miles the next time. It's going to be hard, but nothing will compare to what Beth's family went through and what my family went through. So keep me in your thoughts the weekend of September 11th and 12th as I walk with my team for breast cancer. We are In It To End It!!

If you want to check out my sponsor page, the link is HERE. THANKS to many of you who have already supported me. I think it's a super important topic to talk about because cancer affects so many people. You can BET i'm taking my camera with me to document every mile we walk. My walking team doesn't know they have a little paparrazi on their hands, LOL!!

Thanks for listening today and stopping by everyone!