Monday, December 19, 2011

Snowflake Ornaments

Oh Pinterest, how I love you! Just like the other 20 million people who discovered Pinterest this year. I love being able to have so much inspiration in one place. Come over and follow me if you're on Pinterest (HERE). A few weeks ago I was searching around for some paper ornament inspiration and kept running across these snowflake ornaments. They seemed fairly easy...cut strips of paper, fold the ends together and then string them together in a circular fashion. Great explanation, huh???


Here they are!! I started with some Pink Paislee Snow Day papers and started cutting. I cut strips 2 inches x 4 inches. I think each snowflake has about 18 strips. I then folded them over to create loops. I punched a hole in each end and strung some baker's twine through all the loops. Then I just pulled the baker's twine tight and tied a knot. Done!


I love the double sided paper and how you can see the different patterns from all angles. Here's a close-up.


And my favorite snowflake cut from the Cricut makes another appearance. I love this snowflake! I cut a few in descending sizes, layered them and added some stickles. And a matching button in the middle.


I only decorated one side because I hung them on my tree and you can only see the front. But you could make them a bit smaller,  add a center to the other side and string them together to make a garland. I think that would be very pretty! My daughter even got in on the fun and made a couple. It was a great project.


Happy Monday!! We had a pretty low key weekend. Lots of football watching and my kids and I made cookies yesterday. Actually, they made cookie while I supervised from my chair. It worked it great, they did such a nice job working together and making cookies. I was quite impressed. I think I need to kick back more often and let them do the dirty work, ha ha!!

Have a great day and thanks for stopping by!!

Friday, December 16, 2011

More Treat Bags

I was really ahead of the game this year. Because my ankle surgery was the first week of December, I spent a good amount of time before that making treat bags, goodie paint cans, and other small gifts for teachers and other people. I was so so happy I did that! This week my husband needed some treat bags for co-workers and I already had them made. The last thing I wanted to do this week was crutch around and try to make treat bags.

Here are the ones I made for my husband. He filled them with those Lindor truffles...so yummy!


I used bag templates from My Scrap Chick and cut them using my Sure Cuts ALot software (SCAL) on my Cricut. So so easy!!! I used kraft cardstock for the base,  My Little Shoebox papers, baker's twine and some fun jingle bells I found at Michael's.The sentiment is from Papertrey Ink.


I used the baker's twine to tie the jingle bells on. I knew my husband would just love to carry around some jingling treat bags, ha ha!!


Today was my kid's last day of school, they are so excited to have 2 weeks off!! And I got my cast off today. My incisions are healing very well and my doctor decided to put me in a boot instead of a cast. I still can't walk on my foot, but I can take the boot off to take a shower. I CAN'T WAIT for a real shower!!! It's the simple things that make me happy.

Happy Friday everyone!

Wednesday, December 14, 2011

Teacher Gifts-Decorated Nugget Tins

Are you looking for a fast easy teacher gift? Time is running out to make something for those great teachers who spend so much time with your kids. Even though we contribute to the class gift,  I always like to make them something special from each of my kids. And since this year i'm not baking, I put together some store bought goodies with a dressed up tin.


I purchased the clear paint cans at Michael's, they are the smallest size available. I bought the Hershey nuggets chocolates at Target. I cut patterned paper into 7/8 inch x 3 inch strips. Once all my strips were cut, I wrapped them around each nugget and secured with my hot glue gun.


I decorated the tin about halfway up from the bottom. No need to cover it completely because the decorated nuggets inside add to the visual interest of the paint can. I wrapped some baker's twine around the can and decorated the top a little bit.


It's just a little something extra to let the teachers know they are appreciated!! My kids will make a card to go along with the tin. So if you are scrambling for something to make the teachers in your life, run to Michael's and get some of these paint cans to decorate!

Thanks for stopping by today!

Monday, December 12, 2011

Just You And Me

Happy Monday!! Did you all have a great weekend? Is your holiday shopping complete? Did you bake holiday goodies this weekend? Can you believe it's only 2 more weeks until Christmas??? No need to panic, I keep telling myself. No need to panic.

Here's a layout I made using the December Blue Hills Meadow kit from Citrus Tree Studio. It's primarily a holiday themed kit, but there is so much more you can do with the great colors in this kit.


I thought the blues and aquas and reds in the kit went well with the blue sky in the photo. The photo is from a camping vacation we took last summer. My daughter took the picture, that's why the angle is so funky! I really like the thick twine in the kit, I just used dots of wet glue to shape it into the swirls and heart on the page.


I will definitely be doing that technique more! It added a fun twist to the twine on the page.

I will be back later this week with some fun holiday decor, some ornaments and more goodie bags to share!! Thanks for stopping by today!

Saturday, December 10, 2011

Gift Card Holder

Hi Everyone!! THANK YOU to all the well wishes I received about my surgery. I survived my ankle surgery and it wasn't all that bad.  It was first thing in the morning and I was home by 1pm. I did wish that I could have brought my camera into the operating room. That room was pretty awesome. There were huge TV monitors all over and all sorts of crazy equipment. And along one side of the room was this super long table that was organized with all sorts of scissors and knives and doohickeys and thingamajigs to use for the surgery. I wanted to take photos so badly! Yes, i'm a crazy scrapbooker. Rumor has it my doctor has some photos of the surgery and I think I want to see them. I think that might make me crazy for sure.

So onto prettier things, like this gift card holder. I used the Blue Hills Meadow December kit from Citrus Tree Studio to make this aqua, red, and white inspired project.


I glued two pieces of cardstock together to make the base of the holder. I then embellished with the December kit. I love love love this snowflake cut from my Accents Essentials Cricut cartridge! I dressed it up with some stickles, a button and baker's twine.


I also added this tag along with more yummy baker's twine.


The cardstock insert inside is just wide enough to hold a gift card. I attached the gift card with a little bit of adhesive and the insert pulls right out.


I love having gift card holders already made and ready to go. Because inevitably I will need one at the last minute and now I have one I can just grab and go. I love being ahead of the game!

Hope you all had a great week. I will be spending my weekend with my foot propped up, trying to find pain meds that work, and doing some online shopping with my husband's laptop on the couch. Hope you have a great weekend. Thanks for stopping by today!

Wednesday, December 7, 2011

Reindeer On A Stick

Happy Wednesday! Today was my last day at work for a while, since tomorrow morning is my surgery. I have to be up at the crack of dawn and to the hospital by 5:45 am. I guess the early bird gets her ankle fixed? Anyway, here's a crafty food project my kids and I did this weekend. My son this was his favorite food craft we've ever done!


We dipped NutterButter cookies into chocolate candy melts. Then added M&M noses, white chocolate chip eyes and broken pretzel antlers. Reindeer on a stick!


After the first couple of cookie fell off the sticks into the melted chocolate, I got smart. I dipped each popsicle stick in melted chocolate, then put it inbetween the two cookie layers. THEN froze the cookies, undipped for about 20 minutes. I only took out a few cookies at a time for dipping and yeah! No more cookies falling off the stick.


I love how each one is different, how some have green noses, and how they are perfectly imperfect! We had so much fun making these. My kids seriously had me on my toes getting the pops out of the fridge fast enough to dip. And have you even dipped a NutterButter cookie in chocolate? Why oh why have I never done this before? Delicious!

Hope you're having a great week! The next time I blog...i'll have a bionic ankle! Okay, maybe not. But it will be fixed and i'll be on my way to healing. Thanks for stopping by today!

Monday, December 5, 2011

Bag In A Box Tutorial

Tis the season for holiday crafting!! I have a fun tutorial today for making a Bag In A Box. I first saw this tutorial over at Splitcoaster Stampers a while ago. It's a cute little bag/box that is perfect for giving away some treats or goodies this holiday season. Do you want to make one? Let's get started.

You will need:
-patterned paper and cardstock (if desired)
-strong adhesive (I used the double sided red sticky tape)
-something for making score lines
-embellies, including ribbon or twine

First, cut a square of cardstock 4 1/2 x 4 1/2 inches. You will only see this cardstock by looking into the box, it won't show on the outside.


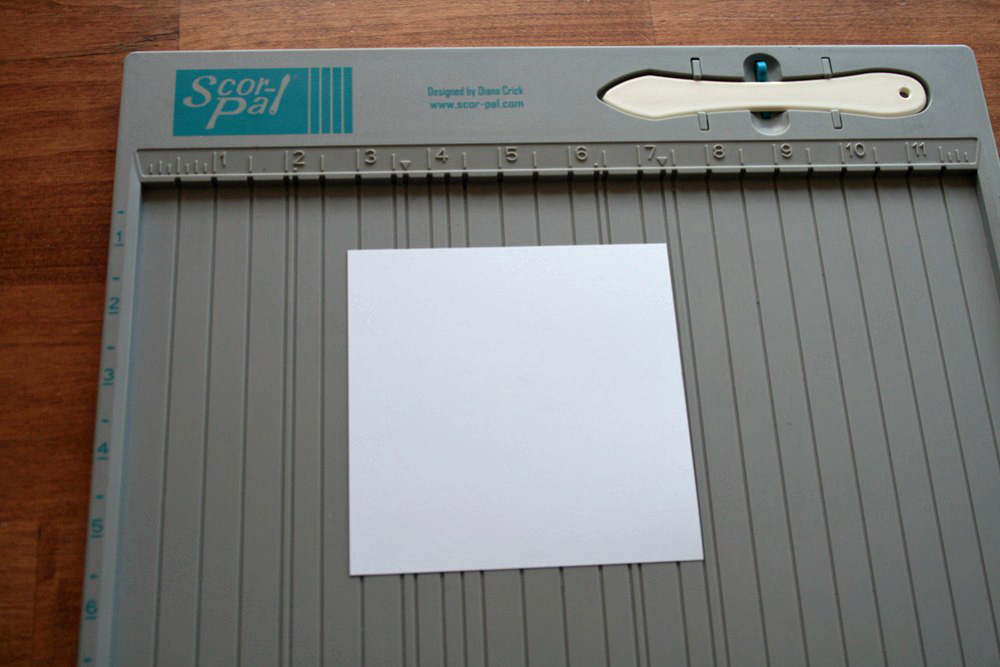
Score each edge 1 inch in. Then score a diagonal between all corners.


Fold on all score lines. On the diagonal score lines, bring the point in towards the middle of your square.


Adhere all corners with strong adhesive, forming a box.


Cut a piece of patterned paper 5 1/2 x 11 inches. Add adhesive to one long side and one short side.


This will be the wall of your bag. Set your box on the long side of the paper and start rolling it up in the paper. If you want the seam in the back of the bag, start rolling your box halfway up one side. I hope this photo demonstrates that!


Start rolling your box along the adhesive edge of the paper, taking care to keep the bottom of the box lined up with the edge of the paper.


Press the adhesive and paper together tightly as you go. Here it is, all rolled up!


This is what it looks like inside. You can see the color of the box from the inside.


Cut a strip of coordinating paper 1 inch x 11 inches. Roll it along the bottom of the box using the same technique. This adds a nice border at the bottom of your bag.


Punch 2 circles from coordinating paper. Fold them in half and add to the top of the bag. Punch holes in the half circles. Embellish the front of the bag as you wish. Use the ribbon or twine to squeeze the bag shut and secure the top. Here's my finished bag!


See how the top comes together?


I used Echo Park 'Everybody Loves Christmas' paper and stickers, Twine from The Twinery and a sentiment stamp from Papertrey Ink.


I had so much fun, I made three of them!


I had a fun time embellishing the front of each bag differently, but with the same basic style. Inside these bags are Ghiradelli chocolates and Lindor truffles. They are fairly roomy and you can actually fit quite a few treats inside! They will be perfect for co-workers and neighbors.

If you find some time to make some of these fun bags, link me up. I would love to see what you've created. Happy Holiday creating and thanks for stopping by!