Yes, I love thin mints. They are my favorite girl scout cookie. I love them almost as much as I love using baker's twine. So you know i'm not messing around. I saw this recipe on Cookies and Cups and just KNEW I had to make it. I took them to a St. Patrick's Day party this weekend so I would not eat the whole pan by myself. Because that really might have happened in the past.
You make these the same way a regular rice krispy treats, starting with melting the marshmallows. But instead of using rice krispies, you use cocoa krispies and mix in chopped up thin mints. Then mix with the marshmallow and press into the pan. AND THEN top them with chopped Andes Mints!
Yes, they were amazing and minty. And they were eaten at an alarming rate at the party. And not only by me, thanks for asking.
Hop over to the Cookies and Cups blog for the recipe: Thin Mint Rice Krispy Treats. I changed it up a little bit by using a 9x13 pan and I didn't include the Andes Mints inside, just on top. Did you know you can buy already chopped up Andes Mints? No unwrapping 50 mints and then chopping them up!
I hope you had a great weekend, Happy Monday!!
Monday, March 19, 2012
Saturday, March 17, 2012
Happy St. Patrick's Day!
Hi Everyone! Happy St. Patty's Day! I hope you have something fun planned today. My husband made green pancakes this morning and we are going to a party tonight where there will be lots of corned beef and cabbage and green beer. No corned beef or cabbage for me, but i'll take seconds of the green beer!
Here is a St.Patty's Day card I made for PSA Essentials last year and thought it was appropriate to share today.
Hope you have a great weekend Friends!!!
Here is a St.Patty's Day card I made for PSA Essentials last year and thought it was appropriate to share today.
Hope you have a great weekend Friends!!!
Thursday, March 15, 2012
Card Club Reveal!
Today is the day that all the girls in my card club reveal their cards! Joni sent us all some amazing supplies this month and i'm sorry to say that I tore into it before taking photos of what she sent. Bad club member. I loved everything she sent and had such a fun time creating!
Here is my first card...
I fell in love with the colors of the papers she sent and I thought they went well with some aqua mist cardstock from PTI. She also sent flowers already diecutted (is that a word??) so all I had to do was roll them up to create these great rolled flowers.
She also stamped great sentiments from Unity Stamps that I used for this card. This stamp is from the Hello My Friend set.
I had lots of paper left so I created another card. Plus, who could pass up these gorgeous butterflies??
This is such a unique sentiment from the Happy for this Moment stamp set by Unity. And you better believe that I used every rolled flower she sent, I loved them!
The heart stick pins were another favorite of mine from her kit, I used these two and created some fun flags for embellishing.
I love being part of this group and I really love getting happy mail. Each kit so far has been so unique and fun to work it. Thanks Joni for a great card kit this month!! Check out the other girls in our group and what they did with the kits.
Thanks for stopping by today and Happy Thursday!!
Here is my first card...
I fell in love with the colors of the papers she sent and I thought they went well with some aqua mist cardstock from PTI. She also sent flowers already diecutted (is that a word??) so all I had to do was roll them up to create these great rolled flowers.
She also stamped great sentiments from Unity Stamps that I used for this card. This stamp is from the Hello My Friend set.
I had lots of paper left so I created another card. Plus, who could pass up these gorgeous butterflies??
This is such a unique sentiment from the Happy for this Moment stamp set by Unity. And you better believe that I used every rolled flower she sent, I loved them!
The heart stick pins were another favorite of mine from her kit, I used these two and created some fun flags for embellishing.
I love being part of this group and I really love getting happy mail. Each kit so far has been so unique and fun to work it. Thanks Joni for a great card kit this month!! Check out the other girls in our group and what they did with the kits.
Thanks for stopping by today and Happy Thursday!!
Tuesday, March 13, 2012
6x6 Paper Pads
I love how so many manufacturers offer a 6x6 version of their paper. The 6x6 paper pads are perfect for cards and other smallish projects, like tags. There is nothing better than flipping through a 6x6 pad just looking for those patterns to call out to you...make a card out of MEEEEEEE!!!! True story, that's what happened to me the other night. My My Mind's Eye Honey Cake paper was calling my name. And I answered.
I just started grabbing patterns and layering them like my life depended on it. Add shapes I cut on my Cricut, some lace, a button, baker's twine, and a Papertrey Ink stamp...and I had myself a card.
I think my favorite is this pretty button with the baker's twine. Yeah for baker's twine!!
When is the last time you had patterned paper calling your name? Or does that only happen to me???
Thanks for stopping by today, friends!
I just started grabbing patterns and layering them like my life depended on it. Add shapes I cut on my Cricut, some lace, a button, baker's twine, and a Papertrey Ink stamp...and I had myself a card.
I think my favorite is this pretty button with the baker's twine. Yeah for baker's twine!!
When is the last time you had patterned paper calling your name? Or does that only happen to me???
Thanks for stopping by today, friends!
Monday, March 12, 2012
Homeade Snicker Bars
Every couple of weeks I get together with a few girlfriends that like to bake and we, well...we bake!! The recipe I'm sharing today is the result of our Friday baking night last week. My friend pinned this recipe on pinterest a while ago with the caption...BAKING NIGHT!!! It was definitely baking night worthy. Homeade Snicker Bars...
If there was ever a time to use O.M.G. and really MEAN it, this is the time. I know I always say that the recipes I post on my blog are fabulous or wonderful or great. But these are some of the greatest bars I have ever made. The recipe was spot on, they tasted exactly like snickers bars. These bars were definitely worth throwing my healthy eating plan OUT THE WINDOW for one night!!!
Everybody absolutely loved them and my girlfriend actually made another pan Saturday morning because word got out. And everybody wanted some. If you like Snickers, please make these. Because you will never eat another stale-been-sitting-on-the-Target-shelf-for-too-long snickers bar again. Baking night was definitely a success this time!!
Here is the recipe from the Brown Eyed Baker blog: Homeade Snicker Bars. The recipe looks long, but it's really just melting ingredients and constructing the layers (with fridge time inbetween the layers). You don't have to turn the oven on at all. That's a bonus.
Thanks for stopping by today! Happy Monday!
If there was ever a time to use O.M.G. and really MEAN it, this is the time. I know I always say that the recipes I post on my blog are fabulous or wonderful or great. But these are some of the greatest bars I have ever made. The recipe was spot on, they tasted exactly like snickers bars. These bars were definitely worth throwing my healthy eating plan OUT THE WINDOW for one night!!!
Everybody absolutely loved them and my girlfriend actually made another pan Saturday morning because word got out. And everybody wanted some. If you like Snickers, please make these. Because you will never eat another stale-been-sitting-on-the-Target-shelf-for-too-long snickers bar again. Baking night was definitely a success this time!!
Here is the recipe from the Brown Eyed Baker blog: Homeade Snicker Bars. The recipe looks long, but it's really just melting ingredients and constructing the layers (with fridge time inbetween the layers). You don't have to turn the oven on at all. That's a bonus.
Thanks for stopping by today! Happy Monday!
Saturday, March 10, 2012
2-4-6-8- Box Tutorial
Happy Saturday friends! What are you up to this weekend? We will hopefully be spending it outside soaking up the beautiful weather. And I guess we will also be losing an hour of sleep tonight, boo! I don't like that part of daylight saving, although I do like it staying lighter at night. So I guess I shouldn't complain.
Today I have a tutorial that I shared over on the Momenta blog this week. It's a tutorial for a fun little gift bag called a 2-4-6-8 Box. I know you are dying to get started...so gather up these supplies...
-Double sided patterned paper or cardstock
-heavy duty adhesive
-something to make score lines
-ribbon or twine
-matching embellishments
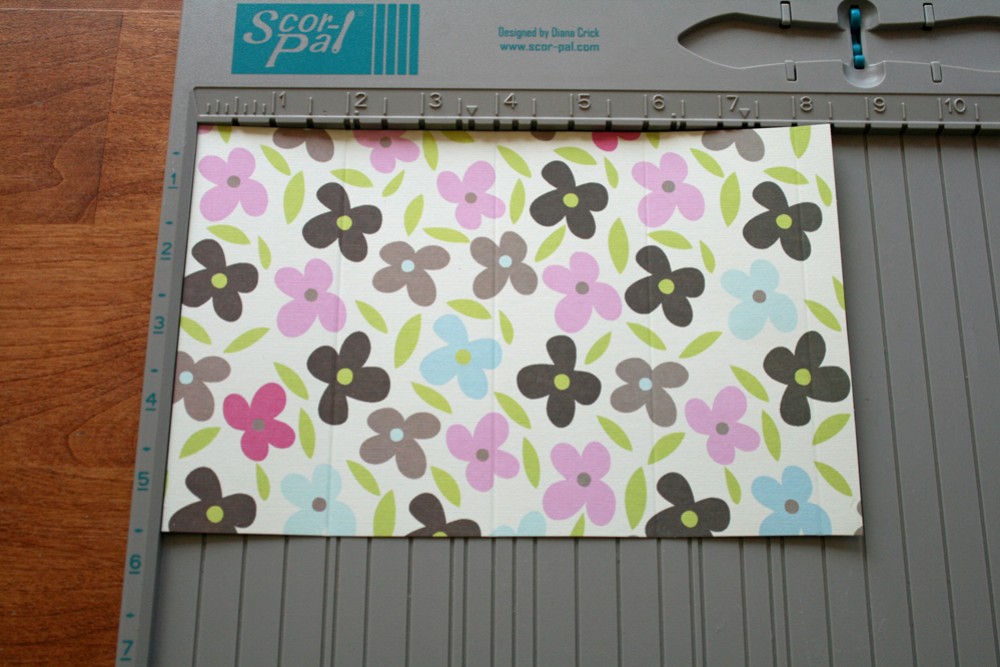
1. Cut your paper 8.5 x 11 inches. Then cut this paper in half at 5.5 inches. You now have enough paper to make 2 treat boxes. I am using paper from the Chloe's Garden Pyramid Pad.
2. Score your paper on the longest edge at 2 inches, 4 inches, 6 inches, and 8 inches.
3. Flip your paper and score it along the short edge at 2 inches.
4. Using scissors, cut the paper at the 2 inch, 4 inch, 6 inch, and 8 inch intervals until it hits the long 2 inch score line.
5. Remove the little extra flap that is right past the 8 inch score line.
6. Apply adhesive to that little flap right past 8 inches. Roll your paper up and secure adhesive covered flap inside so it's not visible.
7. Now you need to secure the bottom of the box. Start by folding over 2 of the 2 inch flaps.
8. Secure the last flap with strong adhesive. If any corner are sagging, just add more adhesive or a little bit of wet glue to hold it all together.
9. Now that you have this shape, you can make two different treat holders. For the first style, pinch the top of the box together by pressing in two opposite side and pinching the top.
10. When the top is pinched together, punch a hole. Tie ribbon or baker's twine through the hole to close the box. You can embellish the front with matching anything!
11. For the second style, you don't need to pinch the top together. Cut a small strip of matching patterned paper and secure as a handle. Now you have a mini basket. For my basket, I used the opposite side of this patterned paper for the outside of the basket. And before I created my 2-4-6-8 score lines, I used a border punch to create a fancy top border.
You can create two different styles from the same starting size of paper. Either of these would make cute Easter treat bags or baskets. Or switch up the paper you use to create party favors, thank you gifts, a birthday treat. The possibilities are endless!
Thanks for stopping by today, have a great Saturday!
Thursday, March 8, 2012
CR84FN Color Challenge #49
I am always up for a challenge and I decided to tackle the CR84FN color challenge. Check out these trendy colors this week!
Yellow, craft, and gray...very pretty combo and very popular right now!
I made some fun rolled daisies that turned out huge. I think they look good on the card but this card will never fit inside an envelope!! I painted them with silver stickles for a touch of glittery goodness.
I also used my favorite border punch and accented the scallops with some bling. I *heart* bling. With all my heart.
Have you tried this trendy color combo yet?? I think you have one more day for this challenge if you want to give it a shot. Thanks for stopping by today!
Yellow, craft, and gray...very pretty combo and very popular right now!
I made some fun rolled daisies that turned out huge. I think they look good on the card but this card will never fit inside an envelope!! I painted them with silver stickles for a touch of glittery goodness.
I also used my favorite border punch and accented the scallops with some bling. I *heart* bling. With all my heart.
Have you tried this trendy color combo yet?? I think you have one more day for this challenge if you want to give it a shot. Thanks for stopping by today!
Subscribe to:
Posts (Atom)