Sunday, May 31, 2009

Moments 2 Remember June Kit!

Over at Moments 2 Remember we had the pleasure of working with the Marrakech line from Basic Grey this month. The blues and oranges and reds worked so well with many of my outdoor photos from this spring. I loved working with it!!

Adventure Awaits: My DH and kids in search of a geocache!!


Family Walk:


Sweet Smiles: I love this pic of me and my kiddies!!


Panda Cupcakes:


Thank you card:


You can see I got a ton of projects from this kit!! This will be my last month designing for Moments 2 Remember. THANK YOU so much Robin and Valerie and Sarah and the rest of the design team. I've had a ball designing with you all!!!

Friday, May 29, 2009

Who's scrapping this weekend??

If you are...come on over to Scrap That for our online crop!! There are tons of challenges and games and chatting going on. Here is my technique challenge...distressing! I distressed all the paper and the chipboard and inked along the edges.


I also posted a tutorial on how to make the world's easiest treat bag. I got this idea from Jennifer McGuire, saw it on her blog during the last holidays. I have made a few since then and it's always fast and easy!

What you will need:
Piece of patterned paper or cardstock measured 3 inches x 11 inches
Something to score with
Something to embellish with
Plastic treat bag (like the kind you get at the big box craft stores)

First...score your paper at 4 inches, 6 inches and 11 inches.


As you fold up the bag, you'll see you have a 1 inch overhang to seal up the top of your bag.


Decide which side is going to be the front. Embellish now, it will make things easier in a minute. Use some really sticky tape to close the top flap. Now punch a wide hole with a circle punch or just your scissors.


Take your plastic treat bag and fill it with goodies. Thread the top of it through the hole in your newly made treat bag. Tie closed with a ribbon and tag. You are done!!


I looooove these new star stamps from Papertrey Ink!!


So come on over to Scrap That...make a treat bag and join in on our challenges and chatting! See you there!!

Wednesday, May 27, 2009

Memorial Day weekend

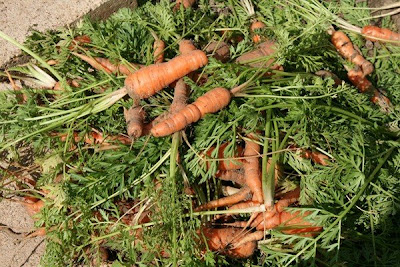
What a nice weekend!! We had beautiful weather and our weekend was packed with fun stuff going on. Monday we worked in the garden because the compost was ready!!!


We pretty much have carrots growing all year round and the kids love them. But we needed to pull them all out, so we could reconfigure the garden to plant our summer crops. And there were tons of them!!


The kids were eating them after a very minimal wash. That was before I decided they probably should not be eating the garden dirt! We planted radishes, tomatoes, cucumbers, and a watermelon. Guess which one the kids are most excited about??? In the afternoon we went for a scooter ride through the neighborhood.


Lots and lots of flowers in bloom all over the place.


Trees like this one line the streets around our house.


It was such a pretty day. And my kids agreed to some jump photos!! The one of Kevin cracks me up!!


I hope you all had a great weekend! I am so messed up this week with what day it is. I have no idea if it's Tuesday or Thursday. And it doesn't help that a meeting I usually have on Thursday got moved to Wednesday...now that is really messing me up!! Oh wait, it's Wednesday. Thanks for stopping by!!

Monday, May 25, 2009

It's Blog Hop Time!!

It's time again for the Papertrey Ink Blog Hop!!!


This month's challenge was to use something yellow. Well, yellow is not a color that I use very often. So this was a bit of a challenge for me. Regardless, this is what I came up with!!


Lots of my current favorites on this card. Polka dot paper, pearls, Wishing You stamp set and my apron lace punch!! I ended up liking my final creation and I gave this card to my MIL for her birthday. Maybe i'll just have to break out the yellow more often!!

Thanks for stopping by...have fun tonight at the Blog Hop!!

Saturday, May 23, 2009

My Last Cake

I finished my cake class with probably the toughest cake so far...figure piping. What the heck is that??? It's making little clowns or figures or people on your cake with frosting. We covered Tootsie Pop lollipops with frosting and made heads with hair, hats, and faces first. Then we piped the bodies on our cake and added the heads. Our teacher made it look sooooooo easy!!! She made figures sitting up, lying down, climbing over the cake, etc. It was really not that easy...LOL!!


My cake looks a bit crowded, but I had to make sure I had 4 people so everybody at home would get a head!! Hee hee!! Here's one clown that is climbing over the side of the cake, he's my favorite. Look at his cute little bum!


He's supposed to be wearing a baseball hat...or maybe it's just a big blob of purple frosting??? Here's another little dude, he's supposed to be popping out of the cake and holding a bunch of balloons. His face got destroyed during the ride home in the car and is not intended to scare any small children...


I also attempted to make a little curly girl sitting down holding some flowers, but she got smashed also during the ride home and won't be shown close up. I don't want my cake to end up on the Cake Wrecks blog!!! Which, by the way, has some of the BEST cake disasters i've ever seen. You will spend hours laughing on this blog, so beware if you're short on time.

I could see making these little figures on cupcakes, wouldn't that be cute for a kids party? This was definitely the hardest lesson and will definitely take some practice. But all in all, I loved my class! I think I might go through cake withdrawl, not having a cake in the house next week. Probably better for my wasitline.

Hope you're having a fabulous Saturday!!

Wednesday, May 20, 2009

Sweet Cupcakes

Not only do I love to bake and decorate cupcakes, I like to craft with them too!! I decided to make this set of birthday cards as a thank you to my cake instructor. She was great and I really learned so much. So what better thing to use for her than my cupcake stamps!! I first created this captured card case from a template I got from Papertrey Ink. I decided on a black/red/white/kraft color theme and just went for it!


Lots of stickles on the frosting!! And I love my new apron lace punch (thanks, Mom!!), I use it all the time!! And some of the cards that are going inside...


I love the Kraft color with the red. One of my new favorite combinations. I hope she likes them. Tomorrow is my last cake class so stay tuned for a new cake creation soon!!!
Thanks for stopping by!

Monday, May 18, 2009

There's a new kit club in town...

Do you have crafty kids? Do your kids like to scrapbook with you, stamp with you, get creative with you? Do your kids want to scrapbook with you but you don't know where to begin with them? Then a Scrapbook Pizza Kit for Kids is definitely for you!! These kits are based on 8x8 size scrapbook pages, the perfect size for kids. They include 8x8 and 6x6 sized patterned paper and cardstock along with all sorts of coordinating kid friendly embellishments. Letter stickers, ribbon, ricrac, buttons, gems, bling, stickers, and custom cut diecuts may all be included. Each kit also contains a tool like pens, punches, or stamps (to name a few). And the best part is the kits are delivered to your doorstep, addressed to your child, in a pizza box! Now who wouldn't love that!!

The May kit called 'Young Chef' is now available. It contains baking themed papers and embellishments. I'm sure you have photos of your kids making cookies, baking bread with grandparents or just licking the frosting beater. This kit would be perfect for that!!


The best part?? All kits are under $12, what a deal! So come on over to Scrapbook Pizza and discover the monthly kits. There is a subscription program and you can sign up for a 3-month or 6-month subscription. This will guarantee your child gets a custom kit each month. What better way to keep your kids busy this summer with their very own scrapping kit? Let your kids start preserving their own memories with a Scrapbook Pizza kit.

Sunday, May 17, 2009

Weekend Update!

Another weekend has come and gone...and back to work and working out tomorrow morning. I fell off the healthy wagon a teeny tiny bit today (please see previous cupcake post for the reason!!!) but going to get back on tomorrow. Friday night we had so much fun at our school's carnival. Kayla got to dunk her teacher in the dunk booth and was super excited about that! No photos, because guess who forgot her camera!! Ooops!

We also had the last baseball and softball games of the season. Kayla got her trophy and was so proud of it!


I finally brought my camera to one of Kevin's games, he did so well on Saturday!! 5 hits and some really good plays in the field.


And today was just beautiful and the perfect time to practice some NO TRAINING WHEEL bike riding skills!! Kayla can finally start and stop by herself, yeah!!


You should see her cut those corners close when she turns. A little daredevil, I tell ya. And Kevin is very confident now and is starting to try little tricks. I see a visit to the ER this summer. And after that, they begged and begged for Craig to set up the little pool in the backyard. They literally played in this pool for about 4 hours today. All while wearing their goggles...for the 4 inches of water in the pool. They had the time of their lives!!!


That's about it!! It was a great weekend and now it's back to work and school tomorrow. Not too many days left of school for the kids. I can't wait for all our summer camping trips. Thanks for stopping by!!

Saturday, May 16, 2009

Cupcake Garden

Wednesday night in my cake class we practiced lots and lots of flowers!! We had to bring cupcakes and made eat one into a different flower and we even learned The Rose.


We made a sideview carnation...


Top view carnation...


Daffodill (mine looked like something with 3 legs was trying to climb out!!)...


Chrysantamum (I know i spelled that wrong!)...


Sweet peas...


Some sort of generic 5-petaled flower I forgot the name of...


And The Rose!!!


That took alot of practice, but I think I started getting them to look like roses, and not little cabbages. It's so fun learning which tips do what different techniques. I see all my tips in my box and they are all so mysterious and now I know what most of them can do! I hope to remember all this when it comes time to put it to good use. I hope these photos act as a good reference.

Hope you are all having a great Saturday! It was hot for us and now we're having a movie night. I sure hope the kiddies sleep in tomorrow. Thanks for stopping by!!